
One of the most common problems we encounter as a printer is customers submitting low-quality files and images that we cannot print.
By understanding the basics of print resolution, you can avoid unnecessary headaches and ensure your job is done on time and looks great.
In this blog post, we are going to walk you through the basics of print resolution and address the most common mistakes people make when submitting their files for print.
Let’s Get Started
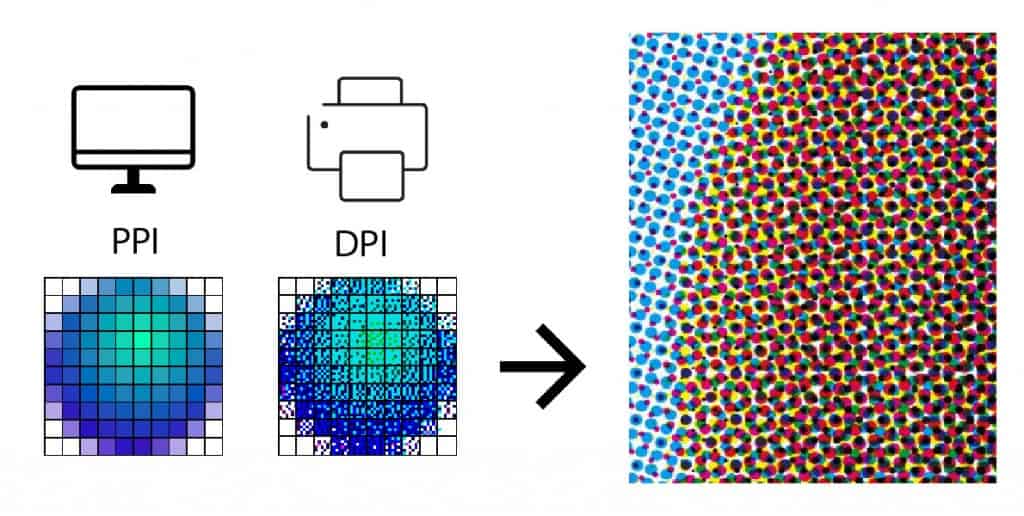
When you are designing a project, you are working exclusively with pixels. When a printer like us goes to print your design, the printer divides those pixels into smaller dots. The resolution of an image is the number of pixels, or dots concentrated in a specified area. Two terms are used interchangeably to describe this:
DPI
In print, image quality is measured as the number of dots per inch or DPI. More dots equals higher quality in terms of sharpness and detail.
PPI
Pixels per inch, or PPI, is most often used to describe the number of pixels in a screen, but can also be used to refer to the pixel density of a digital image. A higher PPI means a more defined and clear picture.
The similarity of the two measurements has resulted in some confusion among those unfamiliar with design software and the printing process.
Essentially, printers use dots because they operate using the additive CMYK (cyan, magenta, yellow, and black) color model, whereas computer monitors and all other digital screens use the RGB(red, green, and blue), additive color model. For more information on why printers use CMYK see our other blog post on the subject.
For the purpose of this blog post, we will be discussing image resolution in terms of DPI, because as a commercial printer that is the measurement we work with most.
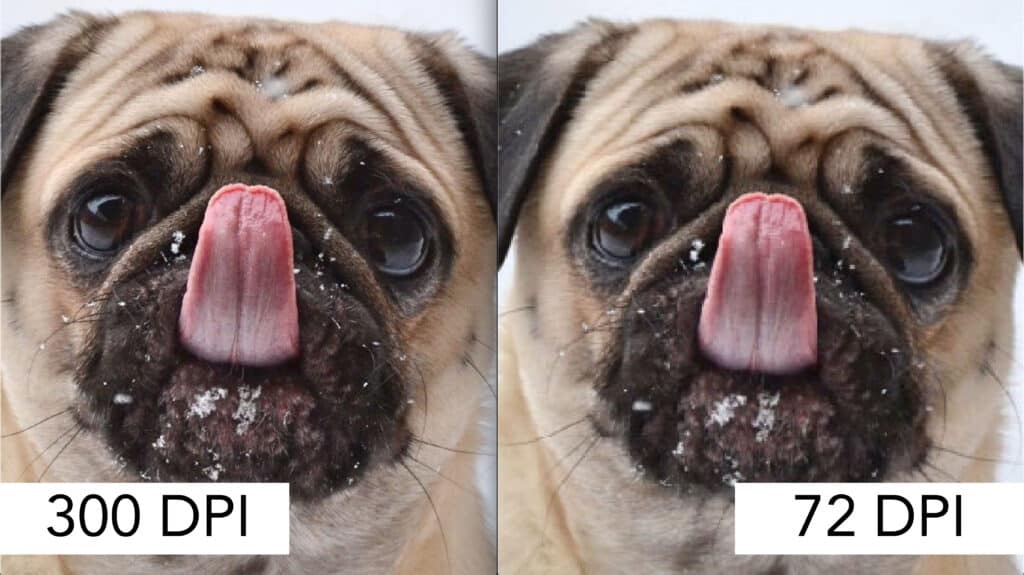
For high-quality printing, 300 DPI is the magic number. In some cases, 150 DPI is acceptable. However, we do not recommend going any lower than that or else your image or graphics will come off the press looking fuzzy around the edges.
The mistake that we see people make most often is copying and pasting a logo from a website that is optimized for digital screens but not for print. As a result, a logo that might look fine on a computer screen will come out pixelated and distorted. The culprit is a low resolution. Most often it is 72 DPI, which is the limit for a screen.
One way people can avoid this problem is by designing logos optimized for both print and digital, that way if you ever need a high-quality logo, it’s ready to go.
However, making the logo or picture bigger does not increase the resolution. The only way to do this in using a design program like InDesign or Illustrator, among others, to increase the DPI.
Also, one last reminder: large file size ( i.e., megabytes) does not necessarily mean the file has a high resolution. The best way to be sure your file is at least 300 DPI go into the image information and double check.
Most printers like us, Replica Printing, have designers who can either help recreate logos/files or advise you on how to create a print-ready PDF file, so if you are still having issues, there is no need to worry.
Hopefully, this will help you prevent fuzzy images or pixelated logos in the future.